Setup Azure AD as an Id Provider
This document will take you through the configuration steps required to set up Azure AD as an Identity Provider over the social login page of your hosted/self hosted Identity Experience framework.
Prerequisites
To configure Azure AD as an Id Provider with LoginRadius, you need the following items:
-
Custom SAML IDP feature
-
Azure AD account
Implementation Guide
Step 1: Configuring App on Azure Active Directory
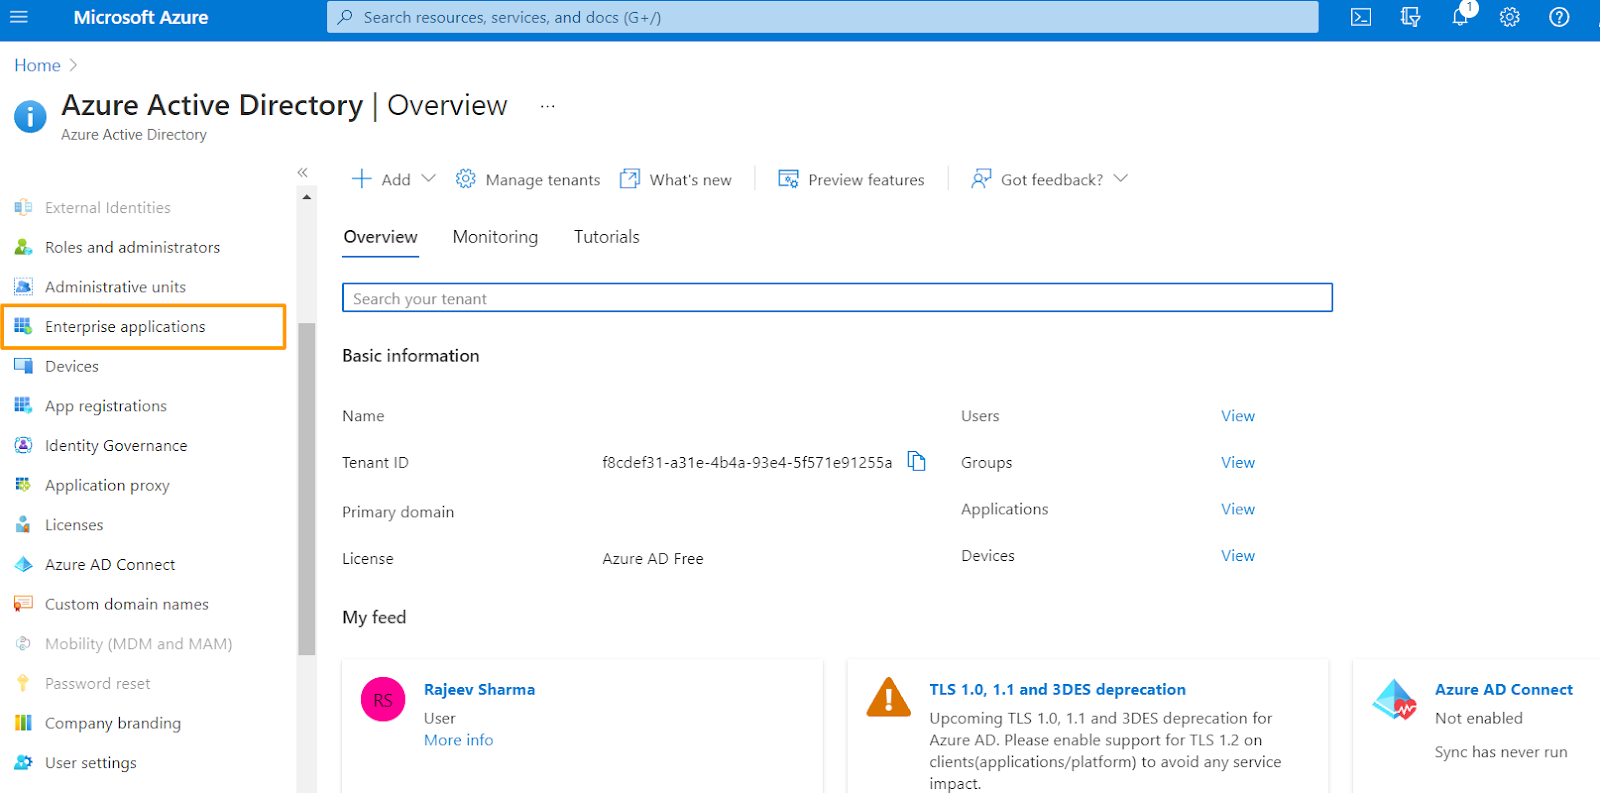
1. Log in to your Azure Portal.
2. Click on the Azure Active Directory tab in the Left panel.

3. From the sub menu appearing at the left, select Enterprise Applications.
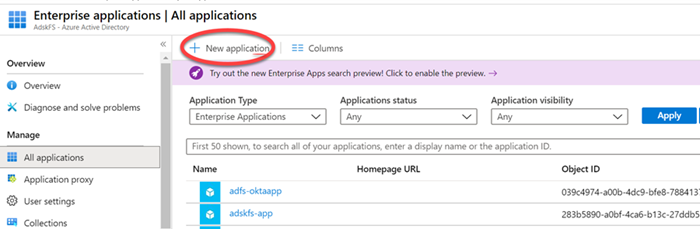
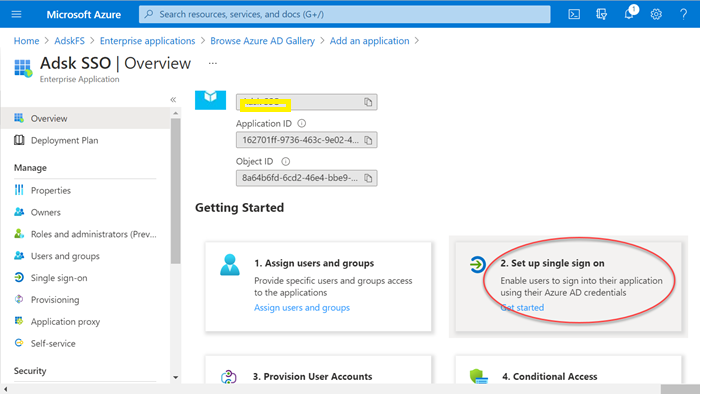
4. Add an application by clicking the New application button at the top.
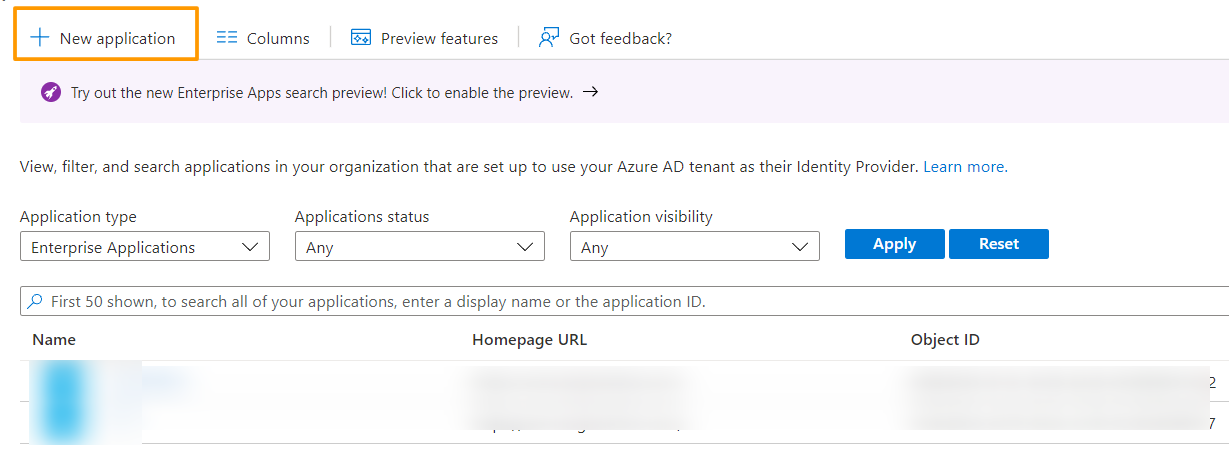
5. Click + New application.
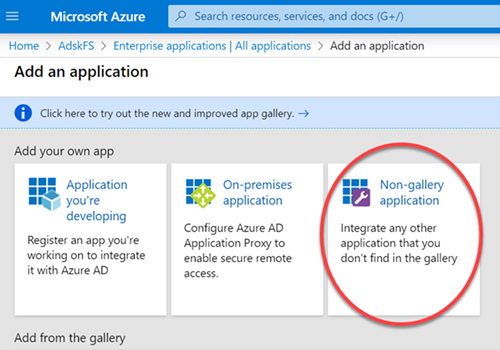
6. In the Add an application section, click Non-gallery application.
7. In the Name box, specify any APP name and click Add.
8. Wait for the application to load, as it might take a while and then click 2. Setup single sign-on item on the screen.
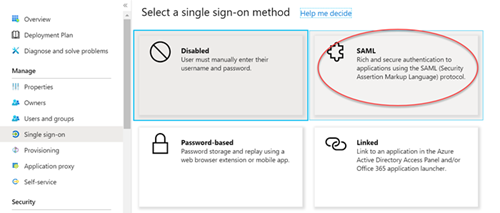
9. Choose SAML to generate some basic information which needs to be configured in respective sections as shown below.
10. In the Basic SAML Configuration section, enter the following values
-
Identifier (Entity ID) :
https://<LR appname>.hub.loginradius.com/ -
Reply URL (Assertion Consumer Service URL) : Add the following URLs
https://<LR appname>.hub.loginradius.com/saml/serviceprovider/AdfsACS.aspxhttps://<LR appname>.hub.loginradius.com/saml/serviceprovider/SpInitiatedACS.aspx
-
Sign on URL:
https://<LR appname>.hub.loginradius.com
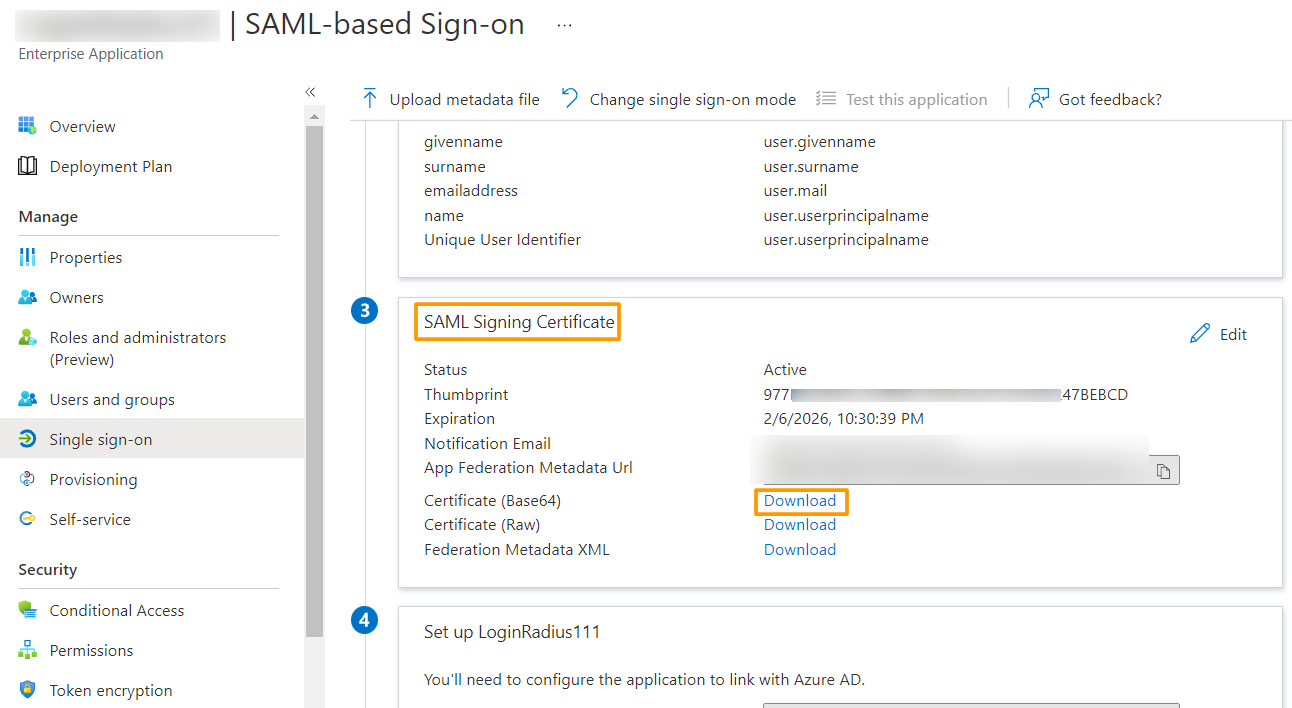
11. On the Set up Single Sign-On with SAML page, download the Certificate (Base64) mentioned under the SAML Signing Certificate section, and save it on your computer.
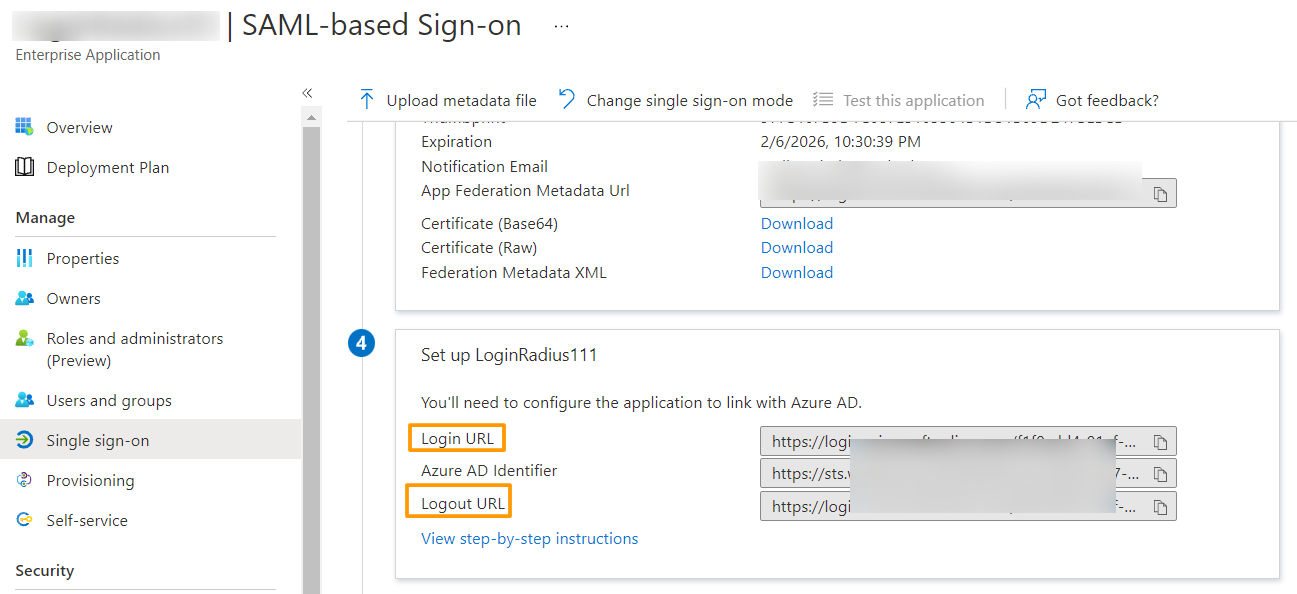
12. Similarly, copy the Login URL and Logout URL from the Set up LoginRadius section.
Step 2 - Configuring LoginRadius Admin Console
Follow the steps given below:
-
Login to your LoginRadius Admin Console.
-
Navigate to Admin Console->Platform Configuration->Authentication Configuration -> Custom IDPs.
-
Click on the SAML Provider tab in the side menu.
-
In Provider Name enter a unique name of SAML app.
-
In the Display Provider Name enter any customized provider name.
-
Select Service Provider Initiated Login from the dropdown.
-
For ID Provider Binding, enter urn:oasis:names:tc:SAML:2.0:bindings:HTTP-POST.
-
For ID Provider Location, enter the Login URL which you’ve obtained from the Azure AD dashboard .
-
For ID Provider Logout Url, enter the Logout URL from the Azure AD dashboard.
-
For ID Provider Certificate, enter the Azure AD certificate which you’ve obatiained from the Azure AD dashboard
-
For Service Provider Certificate and Service Provider Certificate key, enter LoginRadius certificate and key. Please see here for how to generate LoginRadius certificate and key.
NOTE: Make sure to enter the certificate value with header and footer.
Example
-----BEGIN CERTIFICATE-----

<certifciate value>

-----END CERTIFICATE-----
And the certificate value with header and footer
12. For RelayState Parameter, enter RelayState.
13. For DATA MAPPING select the LoginRadius' fields (SP fields) and enter the corresponding Azure AD's fields(IdP fields).Following are some listed field name mapping for your reference:
Note: The Email field mapping is required.
14. Enable Include in Social Schema to include icon on the social schema generated by LoginRadius V2 js.
15. After obtaining all the above details, enter it in the form open as below:

16. Click Add to create the SAML app.
Step 3: Create an Azure AD test user
The objective of this section is to create a test user in the Azure portal called Britta Simon.
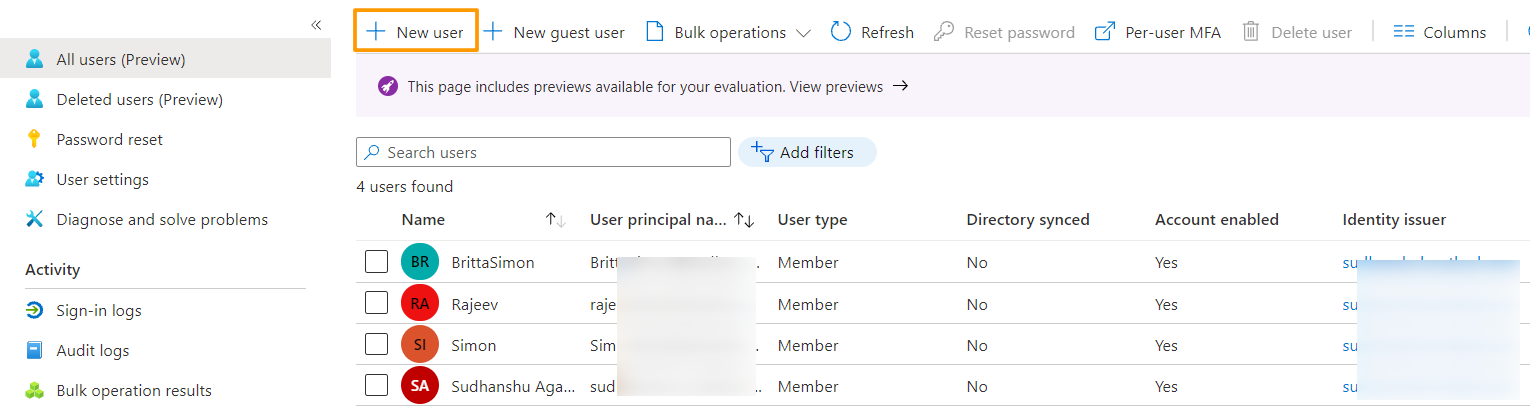
1. In the Azure portal home page, in the left panel, select Azure Active Directory, and then select Users.
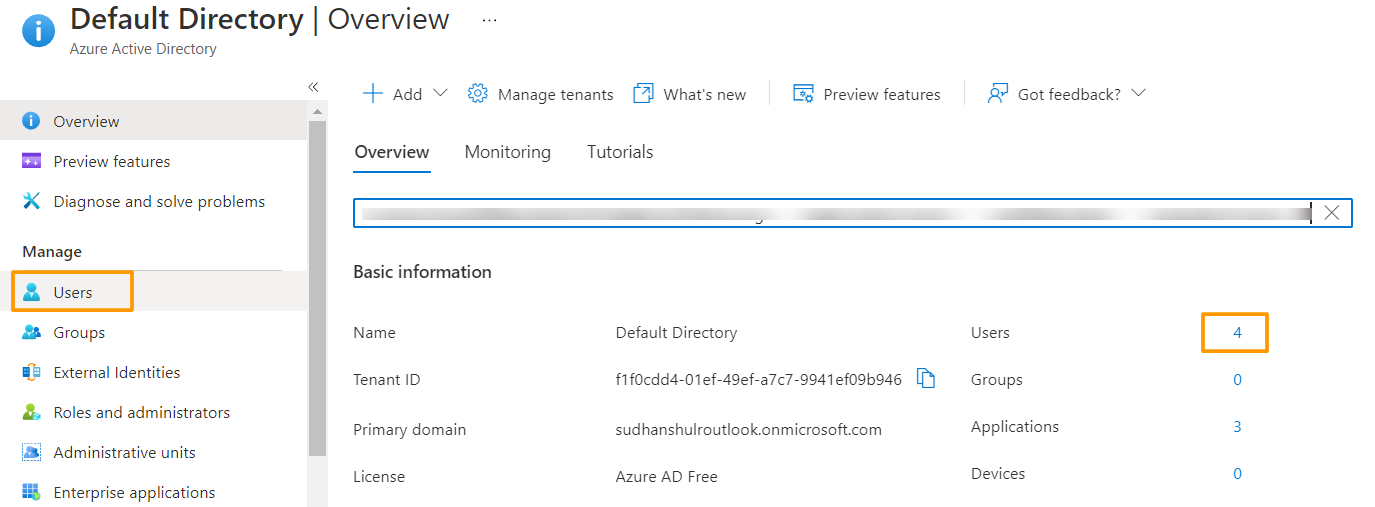
2. This will bring the list of available users, you can also create a new one using the + New user button at the top of the screen.
3. In the User properties (while adding a new user), perform the following steps.
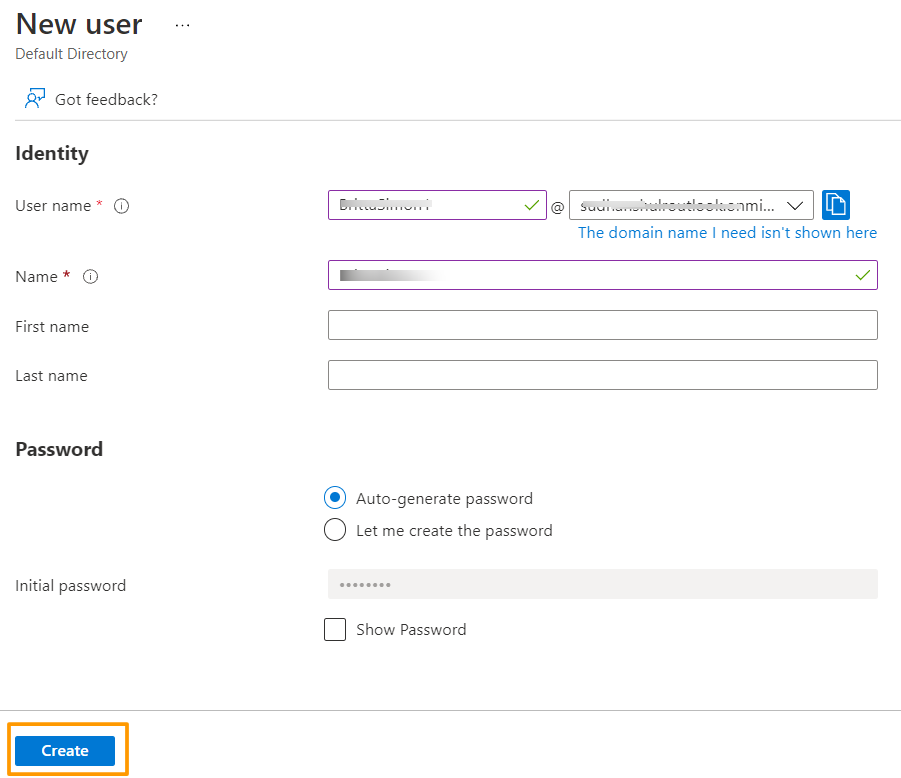
A. In the Name field enter BrittaSimon.
B. In the User name field type brittasimon, the domain will come from the dropdown itself. The provided username+domain will be the email address of the user.
C. Select Show password checkbox, and then note down the value that's displayed in the Password box.
D. Click Create to save the user.
Step 4: Assign the user in Azure AD LoginRadius application
In this section, you enable Britta Simon to use Azure single sign-on by granting access to LoginRadius application.
1. In the Azure portal, select Enterprise Applications > select All applications. This will bring the list of all applications configured, select the SAML application you have created from here. This will open the Dashboard for the application.
2. In the menu on the left, select Users and groups.
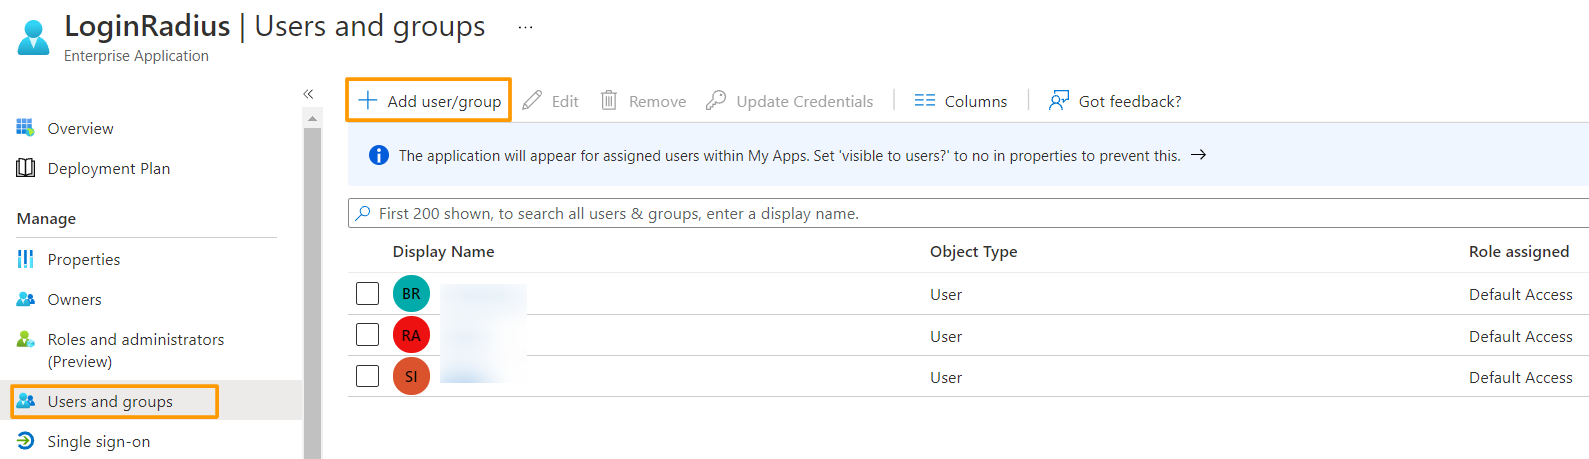
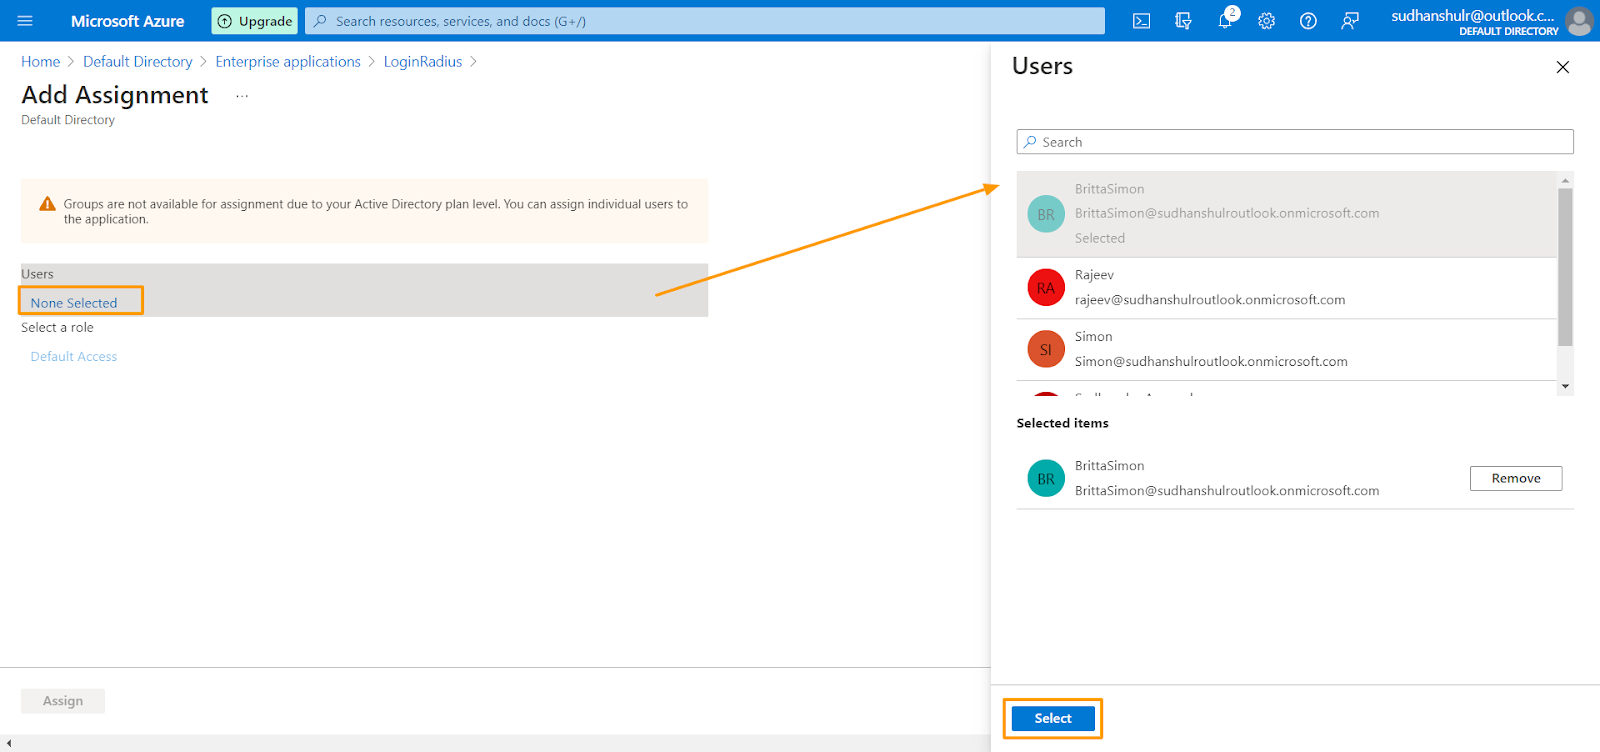
3. Click the Add user/group button, this will open a new window to add User and assign the access.
4. In the Users and groups dialog select the user from the Users list, then click the Select button at the bottom of the screen.
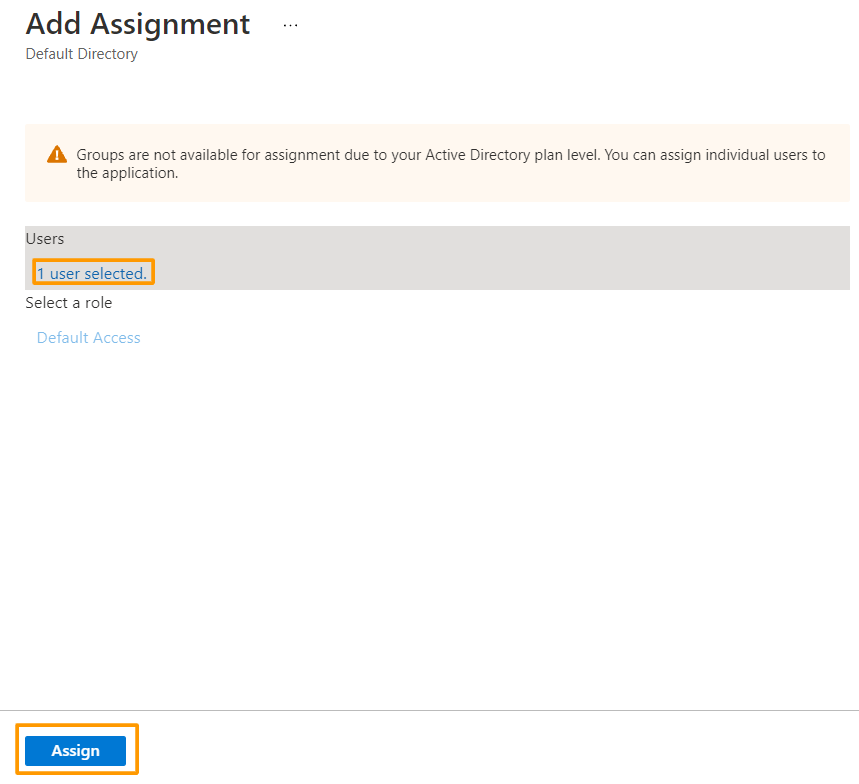
5. In the Add Assignment dialog, click the Assign button.
Step 5: Test single sign-on
In this section, you will test your Azure AD single sign-on
-
Open your IDX page (
https://<LR appname>.hub.loginradius.com/auth.apsx) in your browser. Login with Azure Ad App option will be shown under the social login. -
Click Azure Ad App and it should open a pop-up for asking you to sign into your Azure Ad account
-
After the authentication, your pop-up will closed and you will be logged into the LoginRadius IDX profile page
(https://<LR appname>.hub.loginradius.com/auth.apsx).