Google DoubleClick For Publishers (DFP)
NOTE: While Google DFP is currently not supported in our LoginRadiusV2.Integrations.js. You can refer to this document for details on how you can set up an integration manually.
DFP, DoubleClick for Publishers is a very powerful platform which allows you to manage the advertisements on your website.
DFP provides a number of useful features to help you maximize your revenue. One common strategy is to deliver targeted ads for the website visitors based on their profile, such as gender, age, or what they like. By doing this, your advertisers can generate more click-throughs for the ads, which in turn increases your ad revenue. Follow the guide below to set up a targeted ad with DFP and the data obtained through the LoginRadius social login.
Video Guide
Requirements
To begin, you will need to set up the following accounts:
a. A Google DFP account (which also requires a Google AdSense account) b. A LoginRadius user account (how to setup?) c. Have LoginRadius Interface ready for your website
Also, you will need to understand the process of creating an order and an ad unit in DFP.
Implementation
Step 1. Define a custom targeting key-value pair, and attach it to an order
Feel free to skip this step if you already know how to do it. For those who do not know, we strongly recommend you to become familiarized with the general concepts and layouts of the DFP admin-console before moving forward. This step covers some aspects of this process, but it may not be detailed enough if you are unfamiliar with the DFP Admin-console.
Google's Instruction on custom targeting is here
First, in your DFP Admin-console, go to "Inventory" -> "Key-Values" -> "New Key", and you will see the interface shown below:
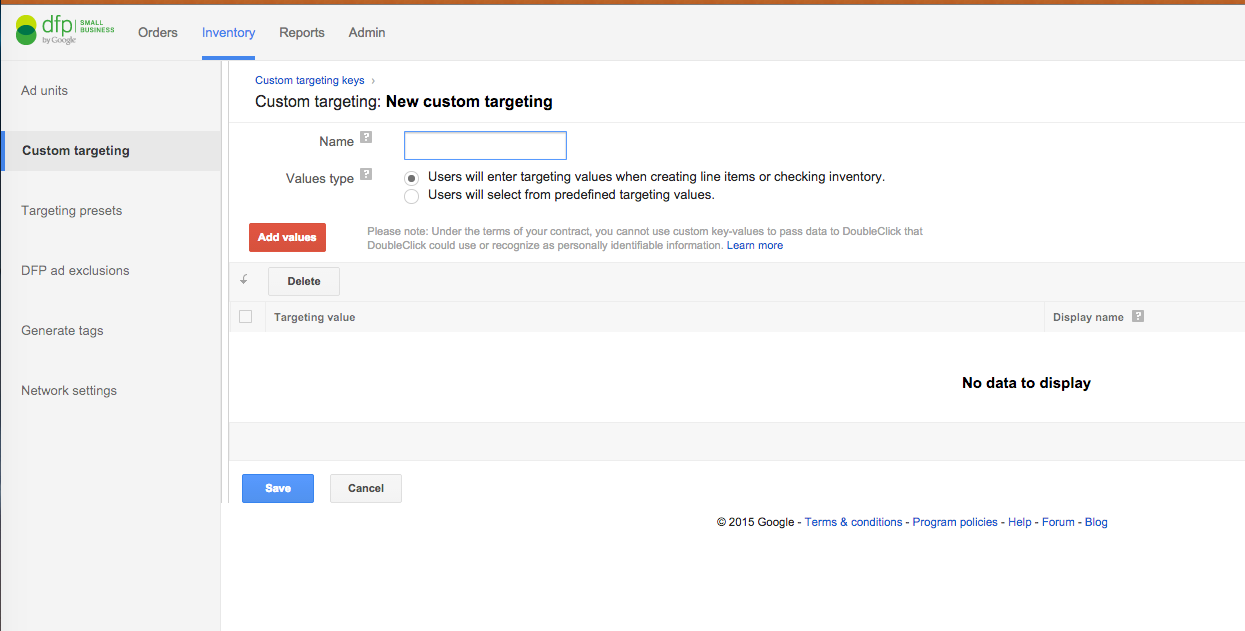
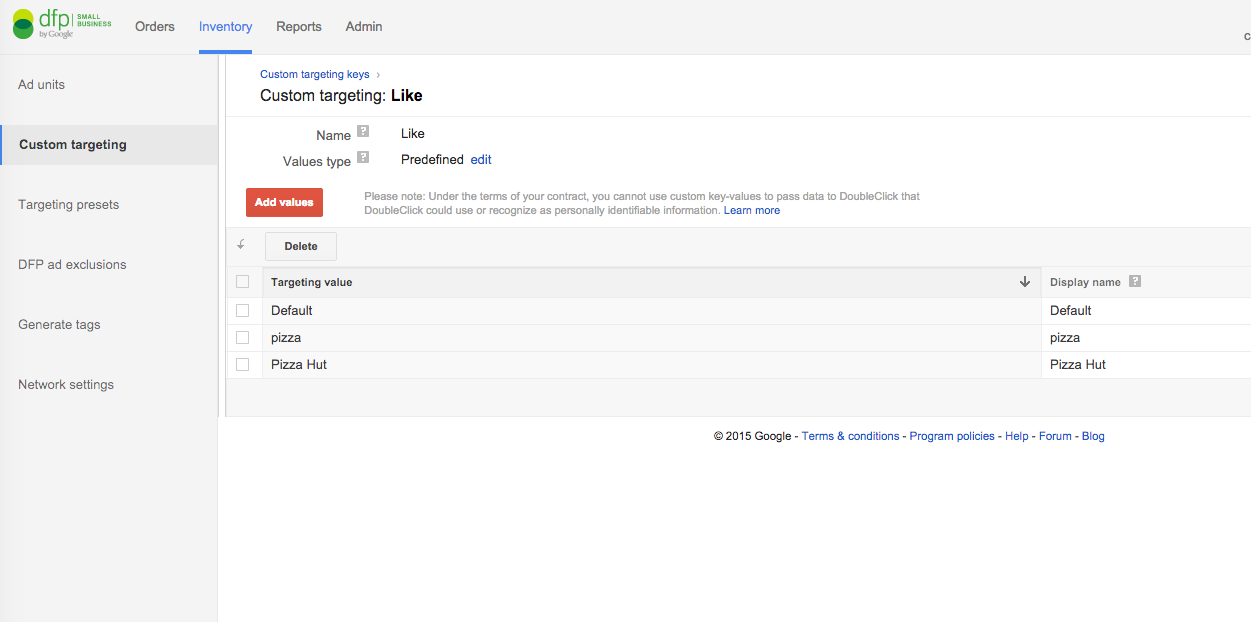
Once you've arrived on this page, create a name for the key, add the value(s), and select the value type for your key. Here, we selected the "pre-defined" type for simplicity (what is value type for a key). The key defined here is "Like" and the values are "pizza, Pizza Hut".
Next, go to Orders, and either create a new line item or go to the existing one. Under its settings, find the "Add targeting" section, select "Custom criteria", and choose the key and value(s) you had defined.
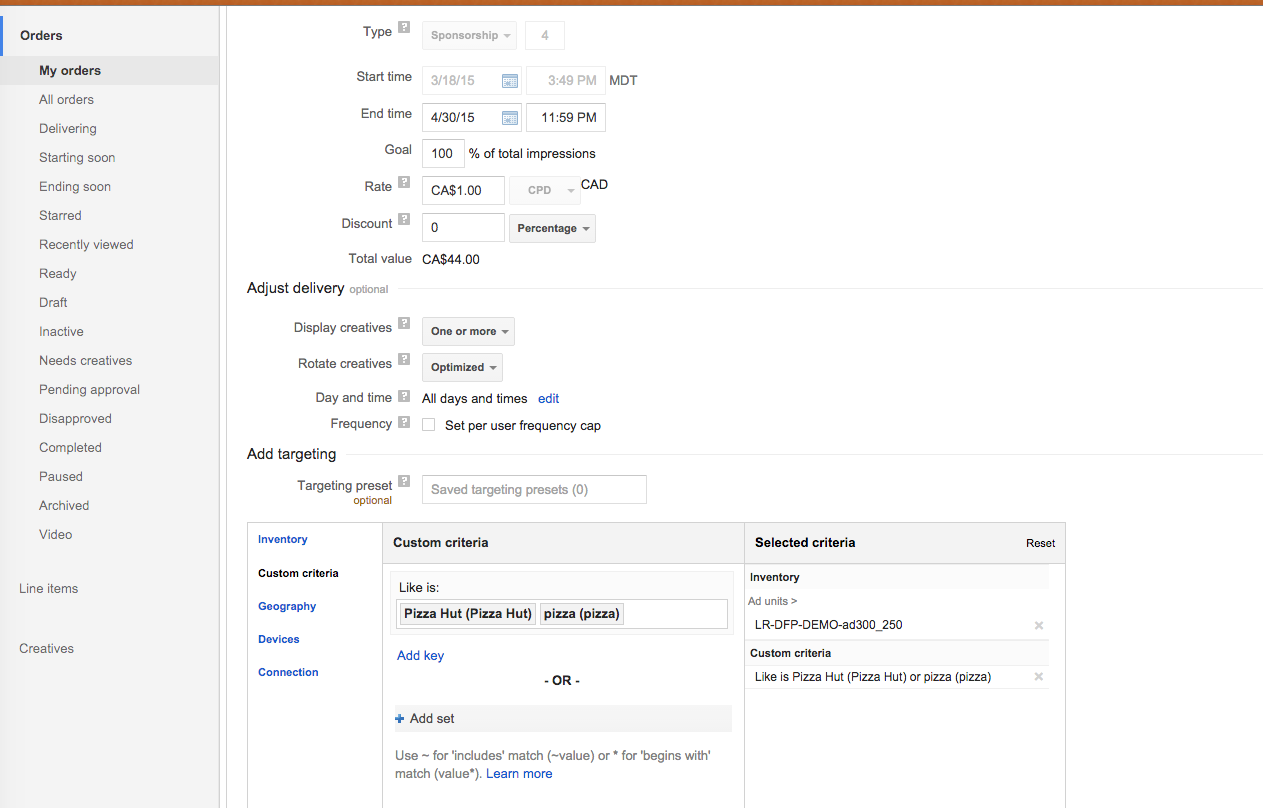
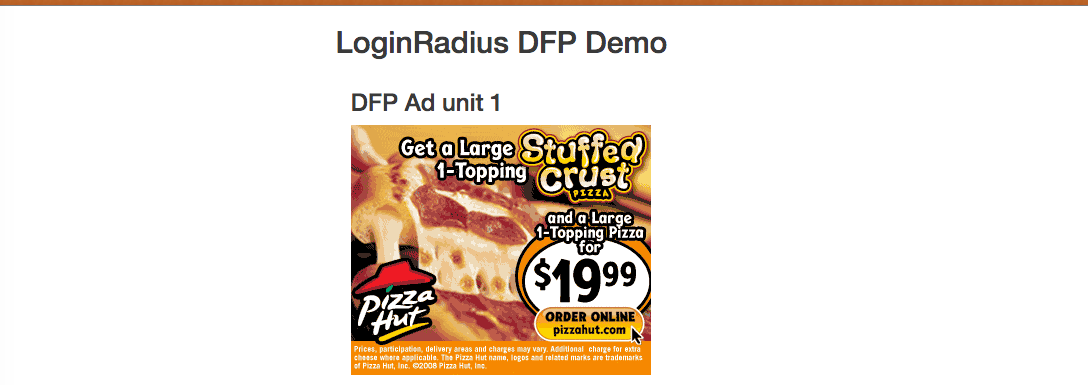
Now, save and upload a creative or image for your line item. For example, a pizzahut.gif is uploaded here, which is an ad for Pizza Hut. Don't forget to approve your line item and generate tags from your ad unit. Here, you will see two code snippets, one to communicate with DFP and the other one to locate each ad.
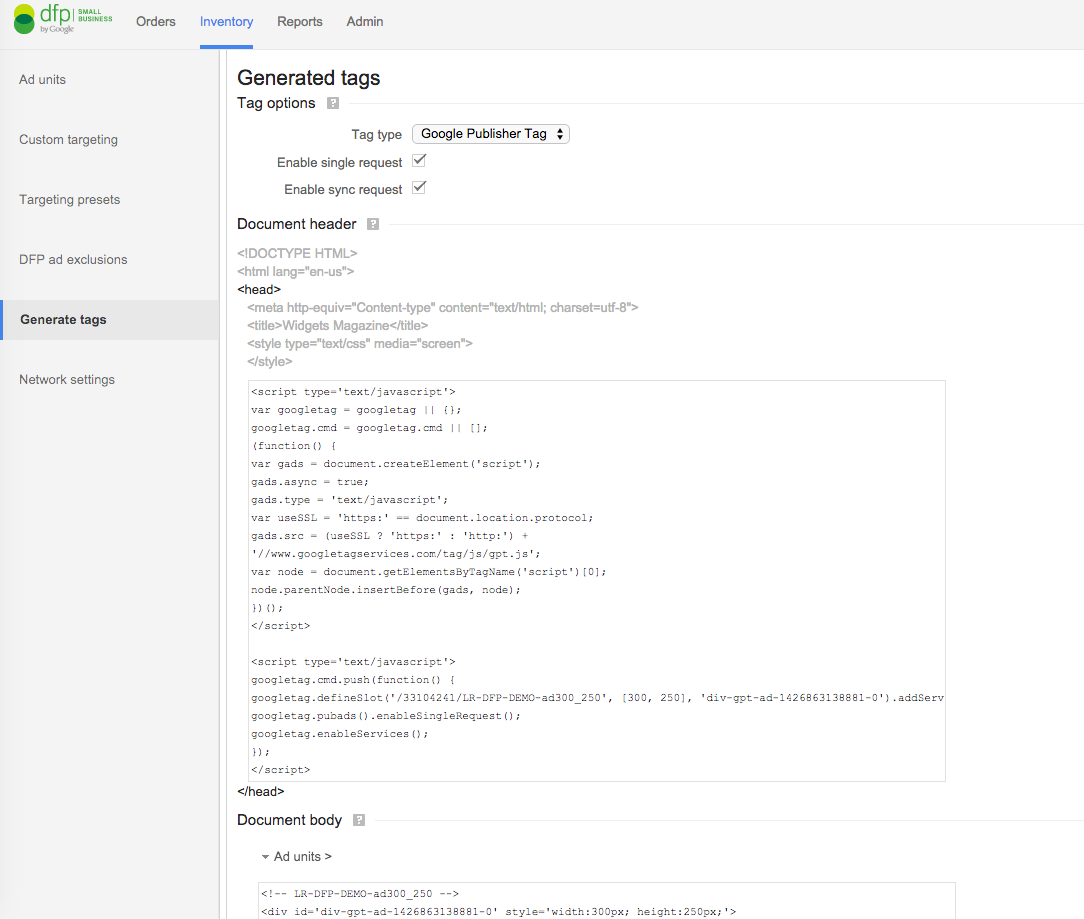
Copy and paste it in your editor, open it in a browser, and if everything works well you should be able to see a random ad delivered by Google AdSense.
Step 2. Get user profile and save into cookies
We will use LoginRadius v2 JS and Like API as an example here.
In the Facebook account, the user has already "liked" Pizza Hut's Facebook page, so after login, call the "Like" API and it will get the response which contains all of the liked pages. Loop it through, if we print them out:
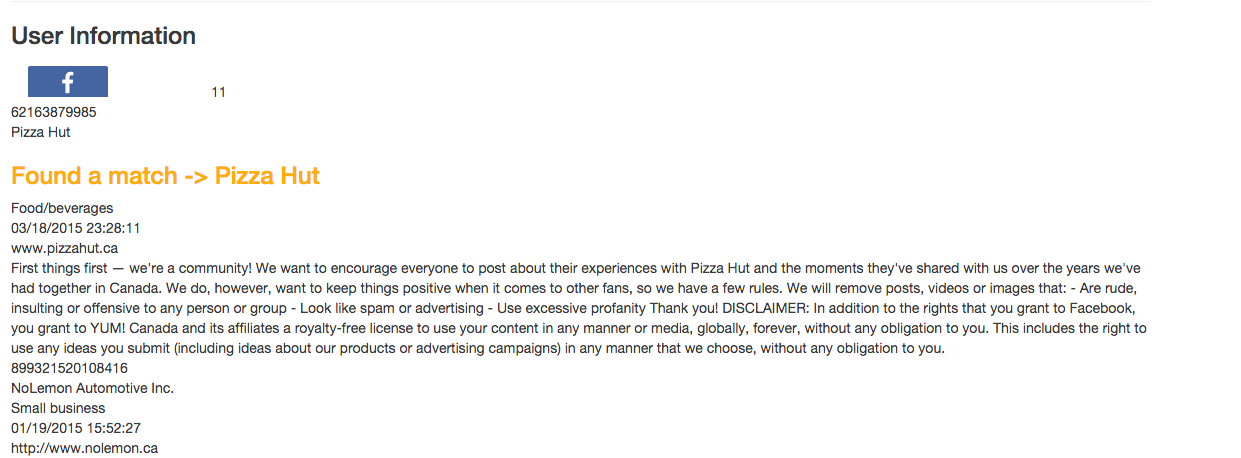
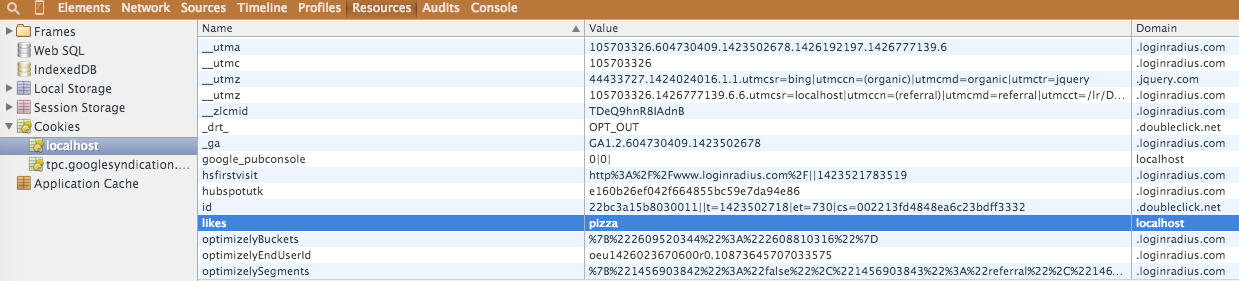
From here, you can analyze the returned response and match it with your predefined array. If there is a match, save it into cookies. In this example, although the match is "Pizza Hut", sometimes it is a good idea to use a more general term to define it, such as "pizza".
LRObject.api.getSocialData("<access_token>",
function(response) {
    document.cookie= 'likes='+response;
    alert(JSON.stringify(response));
},
function(errors) {
    alert(JSON.stringify(errors));
}, "like");
Step 3. Add the ad tags into DFP javascript
Add ".setTargeting()" after ".addService()" to the code created by "generate tag" from above.
    <script type='text/javascript'>

        googletag.cmd.push(function() {
        googletag.defineSlot('/33104241/LR-DFP-DEMO-ad300_250', [300, 250], 'div-gpt-ad-1426717804908-0')
            .addService(googletag.pubads())
            .setTargeting("Like", ["pizza"]); /****** Here is the manually added tag ******/
        googletag.pubads().enableSingleRequest();
        googletag.enableServices();
        });
    </script>
Or, as described in the beginning, read it from the cookies and from the user's profile, and render it dynamically.
    <script type='text/javascript'>
        var likes_array = [];
        var likes = getCookie("likes"); // Get the cookie with key name
        if( likes == 'pizza' ){ // You can define either array or string values for the cookie                                     // and process it as you need, here we just do a simple match
            likes_array.push(likes);
        }

        console.log(likes_array);
        googletag.cmd.push(function() {
        googletag.defineSlot('/33104241/LR-DFP-DEMO-ad300_250', [300, 250], 'div-gpt-ad-1426717804908-0')
            .addService(googletag.pubads())
            .setTargeting("Like", likes_array); /**** Here is the dynamically added tag ****/
        googletag.pubads().enableSingleRequest();
        googletag.enableServices();
        });
    </script>
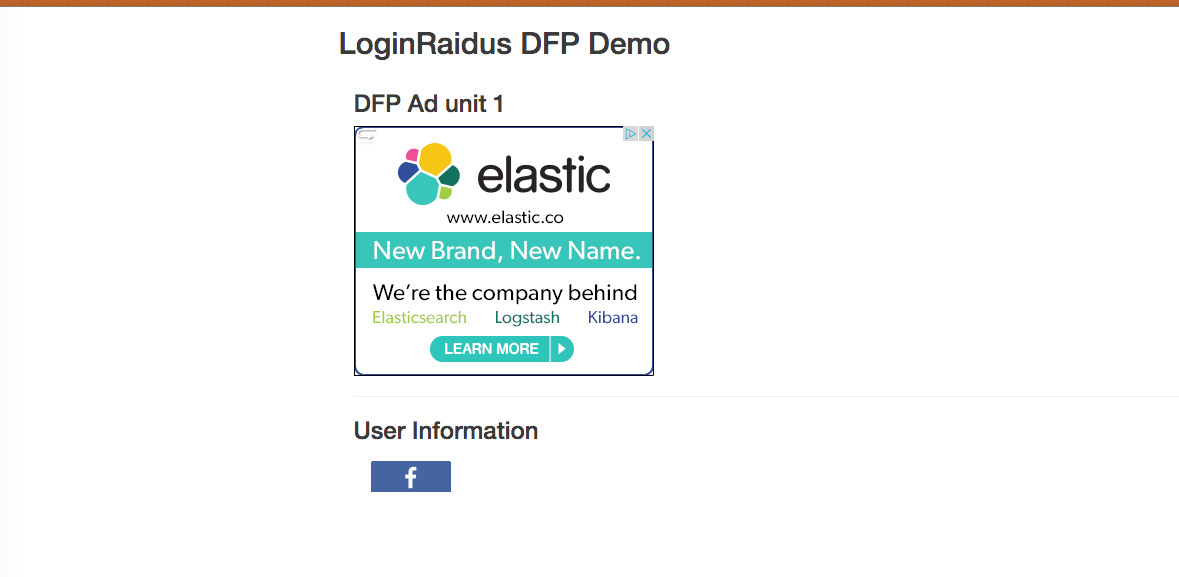
That's it! Now you will see the Pizza Hut creative you have uploaded.